#bootloader unlocking guide
Explore tagged Tumblr posts
Text
How to Unlock a Bootloader Easily {Best Way}
How to unlock a bootloader easily: In today’s digital age, smartphone customization has increased a lot. But the problem arises when someone has to unlock the bootloader of their phone and they do not understand whose help should be taken for this. If you are also one of those people who want to unlock the full potential of their phone and want to know everything about it, then there is no need…
#android bootloader unlock#bootloader unlock tutorial#bootloader unlocking guide#fastboot unlock#how to unlock bootloader#OEM unlocking#phone bootloader#unlock bootloader#unlock phone bootloader
0 notes
Text
Rooting an Android device (commonly referred to as "jailbreaking" on iPhones) is essentially gaining full control over the operating system, including system files, settings, and functions that are otherwise restricted by default. You're right that Android is based on the Linux kernel, but it’s highly customized by Google and device manufacturers, so it’s not the same as a typical Linux distribution you'd find on a desktop. Here's a step-by-step guide on how to root an Android and get shell access, but first, a couple of notes:
Important considerations:
Rooting voids warranties: Rooting will void your device warranty, and it may even brick (render unusable) the device if not done properly.
Security risks: Once rooted, your device becomes more vulnerable to malware and hacking if precautions aren't taken.
Backup data: Rooting could erase all data on your device, so it’s important to back everything up beforehand.
Steps to Root Your Android and Access the Shell
1. Check the Bootloader Status:
The bootloader is what controls what software runs when the device is powered on. Most Android devices have a locked bootloader by default.
Some manufacturers provide a way to unlock the bootloader officially (Google, OnePlus), while others do not (Samsung in the U.S.). Check if your phone has an official way to unlock it. You might need to enable developer options on your device.
Go to Settings → About phone and tap Build number seven times. This unlocks Developer options.
Go to Settings → Developer options and enable OEM unlocking and USB debugging.
2. Unlock the Bootloader:
With OEM unlocking enabled, you can now unlock the bootloader using your computer:
Connect your phone to your computer.
Install ADB and Fastboot on your computer (these tools are part of the Android SDK).
Open a terminal on your PC and run:bashCopy codeadb devices adb reboot bootloader fastboot oem unlock
Your device will prompt you with a confirmation. Use the volume buttons to navigate and the power button to confirm.
Note: Unlocking the bootloader will likely erase all data on your device.
3. Find a Suitable Rooting Method:
Rooting methods depend on your device’s manufacturer and version of Android.
Here are some popular options:
Magisk (most recommended): It allows you to gain root access without modifying the system partition. It also passes Google's SafetyNet checks, which means you can still use apps like Google Pay and Netflix. You'll need a custom recovery to flash Magisk.
SuperSU: An older method that directly modifies system files. It's less safe and can break OTA updates and certain apps.
Flashing Magisk (if you go with Magisk):
Download the Magisk zip file to your phone from Magisk GitHub.
Boot into your custom recovery (like TWRP) using ADB:bashCopy codeadb reboot recovery
In TWRP, go to the Install section and flash the Magisk ZIP file.
Reboot your phone.
4. Install a Terminal Emulator:
Once rooted, you can install a terminal emulator from the Google Play Store (e.g., Termux or Terminal Emulator for Android).
These apps give you direct shell access on the device. Since Android is Linux-based, many typical Linux commands will work out of the box (e.g., ls, cd, cat, etc.).
5. Access the Shell via ADB:
You can also connect to your Android's shell from your computer using ADB:
Open a terminal on your computer:bashCopy codeadb shell
This will give you a shell directly on the device. If you’ve rooted the phone, you can also get root access within the shell:bashCopy codesu
This will elevate your privileges to superuser (root).
Are All Androids Just Linux?
In essence, yes, Android is based on Linux, but it is heavily modified and optimized for mobile devices. Here’s how they compare:
Kernel: Android runs on the Linux kernel, which handles hardware communication, process management, and memory management. But the rest of the operating system is built differently from traditional desktop Linux.
Userland: Android does not use the GNU C Library (glibc) or GNU core utilities by default, which are standard on Linux distributions like Ubuntu. Instead, Android uses Bionic, a lightweight C library designed for mobile use.
File Structure: While Android’s filesystem is similar to Linux’s (you'll see directories like /system, /data, /proc), it is organized differently to support mobile devices and the Android app structure.
Security: Android uses additional security measures like SELinux and a permission-based app model that separates apps from each other and restricts access to system components.
Next Steps for Using Your Android as a "Gizmo"
Once rooted and you have shell access, there are countless projects you could try, such as:
Turning your Android into a Raspberry Pi-like development platform for IoT.
Using it as a network monitoring tool or personal server (with apps like Kali Nethunter).
Repurposing it as a dedicated media player or smart home controller.
If you’re looking to customize and expand the functionality even more, consider looking into custom ROMs (like LineageOS) or building Linux distros specifically for Android devices, like PostmarketOS.
0 notes
Text
Bootloader Unlock Bypass Guide
1. Download these files
👉 Mi flash Tools
👉 Php Zip File
2. Extract Php zip on your PC C local disk

3. From the folder, you can find "bypass.cmd" run it

4. Open your developer options in your device & turn on OEM Unlocking
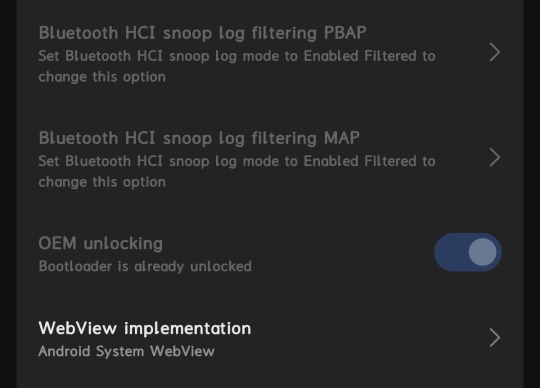
5. Now do Add Mi Account in your device - settings - developer settings - mi unlock status - add account (DON'T USE WIFI, USE MOBILE DATA )

6. Now Wait for the process to complete
7. Open the MiFlash Unlock Tool & login your mi account
8. Now connect your device in fastboot mode to PC
9. Now Click "Unlock" then it will show you 168hr waiting time
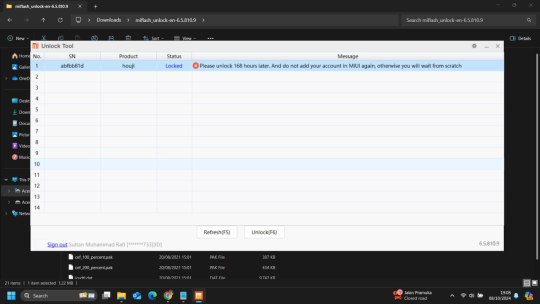
10. After 168hr try to unlock the bootloader with same mi flash tools it will get success.
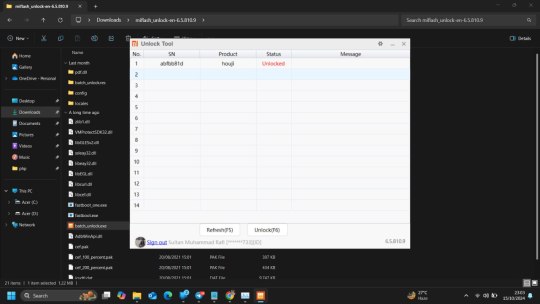
This is latest working method and one guy successfully unlocked it.
This trick worked on Indonesia rom version 1.0.11.0 and the person who tried this trick is from Indonesia.
Note :- If you guys are getting error code 30001 then try with another mi account it's working on India rom also.
Thanks to Sultan from Xiaomi 14 TG Group for testing this method and sharing the guide for all 😊
1 note
·
View note
Text
Steps to Unlock Google Pixel 8 Pro
Unlocking a Google Pixel 8 Pro can refer to different processes, such as unlocking the device from a carrier to use with other networks, unlocking the bootloader for development purposes, or simply unlocking the screen. This article will guide you through the steps for each of these scenarios.
Carrier Unlocking Your Google Pixel 8 Pro
Carrier unlocking allows you to use your Pixel 8 Pro with different network providers besides the one from which you originally purchased your phone.
Step 1: Check Eligibility
Ensure your device is paid off completely.
Your account should be in good standing (no unpaid bills).
The device must have been active on the network for a certain period, as specified by the carrier.
Step 2: Obtain Unlock Code
Contact your carrier's customer service for an unlock code. You may need to provide your account details and the phone's IMEI number (found in Settings > About Phone).
Step 3: Insert New SIM Card
Power off your device, insert the new SIM card from a different carrier, and turn it back on.
Step 4: Enter Unlock Code
Once powered on, the phone may prompt you to enter an unlock code. Input the code provided by your carrier.
Step 5: Confirmation
Your device should now be unlocked. If you encounter issues, contact your carrier for further assistance.
Unlocking the Bootloader on Google Pixel 8 Pro
Unlocking the bootloader is generally sought by users who wish to root their device or install custom ROMs. Warning: This process will erase all data on your device.
Step 1: Enable Developer Options
Go to Settings > About Phone and tap on the Build Number 7 times to enable Developer Options.
Step 2: Enable OEM Unlocking
In Developer Options, toggle on the OEM Unlocking option.
Step 3: Boot into Fastboot Mode
Power off your device. Then, hold the Power and Volume Down buttons simultaneously to enter Fastboot Mode.
Step 4: Connect to Computer
Connect your Pixel 8 Pro to a computer with ADB and Fastboot installed.
Step 5: Unlock Bootloader
Open a command prompt or terminal on your computer and type: fastboot flashing unlock
On your phone, use the volume keys to select "Unlock the bootloader" and confirm with the power button.
Step 6: Reboot
Once the process is complete, reboot your device by selecting "Start" with the power button.
Screen Unlocking
If you're simply looking to unlock your Google Pixel 8 Pro screen (e.g., you've forgotten your PIN, pattern, or password), follow these steps:
Step 1: Use Google's Find My Device
Go to Google's Find My Device service from another device or computer.
Step 2: Select Your Device
Choose your Pixel 8 Pro from the list of devices.
Step 3: Use the "Lock" Option
Choose the "Lock" option to set a new lock screen password, which will replace the one you've forgotten.
Step 4: Unlock Your Phone
Use the new password to unlock your Pixel 8 Pro.
Conclusion
Unlocking your Google Pixel 8 Pro, whether for carrier use, bootloader access, or screen unlocking, is a straightforward process if you follow the steps carefully. Always ensure you understand the implications, especially with bootloader unlocking, as it can void your warranty and erase your data. If you're unsure about any step, consult with a professional or reach out to Google's customer support for assistance.
1 note
·
View note
Text
How to Root Huawei Mate 40 Pro with Magisk without TWRP
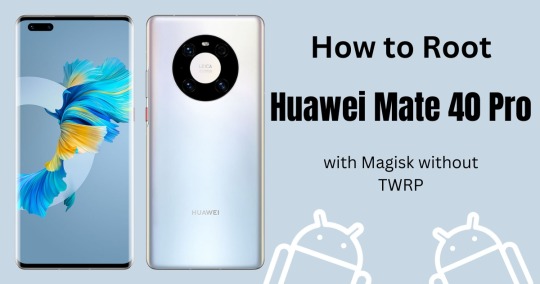
In this guide, we'll explore how to root Huawei Mate 40 Pro using Magisk patched boot.img. While devices from this manufacturer typically don't see much custom development, they've carved out their own niche. Recently, the popularity of the Huawei Mate 40 Pro has seen a steady rise, particularly among tech experts looking to root Mate 40 Pro for enhanced functionality and customization. Read More - Does Rooting or Unlocking Void Your Android Phone Warranty Nonetheless, there is one crucial step you need to fulfil before you can successfully root Huawei Mate 40 Pro - ensuring your bootloader is unlocked. Once this prerequisite is met, you can start exploring various modifications. You can flash custom recoveries like TWRP or custom ROMs such as LineageOS. More so, you can even gain administrator privileges! With an unlocked bootloader, the process to root Mate 40 Pro becomes a lot more straightforward and accessible Read More - 30 Amazing Things You Can Do After Rooting Your Android Why are we waiting? Let's get into business.
Table of Contents
Understanding the Pros and Cons of Rooting Huawei Mate 40 ProPros of Rooting Huawei Mate 40 Pro Cons of Rooting Huawei Mate 40 Pro How to Root Huawei Mate 40 Pro using Magisk Patched Boot.img Conclusion Frequently Asked Questions (FAQ)Despite unrooting my mobile and using Magisk HIDE, apps still report my device as rooted. How can I fix this? I'm facing boot loop and app crashes after uninstalling Magisk via TWRP. How can I fix this? What can I do if Magisk 16.3 keeps uninstalling itself? How can I resolve the MAGISK v16.0 installation failure message? What should I do if I encounter an error while installing Magisk using TWRP on my device? What are the steps to resolve OTA Update failure after rooting with Magisk on a device? What can be done if MagiskHide or SafetyNet fails after an update? What can I do if Magisk isn't working as expected, such as not detecting the installation or experiencing loss of root? What does the message "Invalid image: not signed" in the install log mean? What causes a "process error" when installing Magisk and how can it be fixed? Why can't some users install or update the Magisk app or Magisk in the app v8+? Why can't I root my Huawei Mate 40 Pro with Magisk even after following the step-by-step guide provided on the website?
Understanding the Pros and Cons of Rooting Huawei Mate 40 Pro
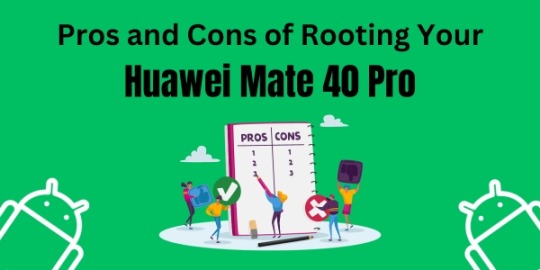
When you decide to root your Huawei Mate 40 Pro, it's essential to know what you're getting into. Rooting has its advantages, but it also comes with certain risks. Let's take a closer look at the pros and cons of rooting your device. Pros of Rooting Huawei Mate 40 Pro 1. Full Control Over Your Device: Rooting your Mate 40 Pro allows you to have full administrative control over your device. This means you can customize your device as you wish. 2. Improved Performance: After you root the Mate 40 Pro, you can optimize its performance, increasing its speed and battery life. 3. Access to More Apps: Rooting gives you access to a variety of apps that are not available to non-rooted devices. Cons of Rooting Huawei Mate 40 Pro 1. Voiding Your Warranty: One major downside of rooting is that it typically voids your device's warranty. Thus, any issue you encounter after rooting will not be covered. 2. Risk of Bricking Your Device: If the root process is not done correctly, there's a risk of "bricking" your device, i.e., rendering it unusable. 3. Increased Vulnerability to Malware: Since you remove the protections put in place by the manufacturer when you root your device, your Mate 40 Pro may become more vulnerable to malware and viruses. In conclusion, while there are many advantages to rooting your Huawei Mate 40 Pro, it's essential to consider the potential downsides. Make sure you understand the risks before deciding to root your Mate 40 Pro.
How to Root Huawei Mate 40 Pro using Magisk Patched Boot.img
In an effort to streamline the process of how to root Huawei Mate 40 Pro, we have broken down the instructions into distinct sections. It's crucial that you adhere to these steps precisely, leaving none out. Please be aware that we cannot be held accountable for any potential damage to your phone or loss of data while you root Mate 40 Pro. Always proceed with caution. Read More - The First 10 Things to Do After Rooting Your Device Step 1 : Install Android SDK

Firstly, to root Huawei Mate 40 Pro, it is imperative to install the Android SDK Platform Tools on your computer. As many tech enthusiasts might already know, this is the officially recommended ADB and Fastboot binary supplied by Google for this procedure. Simply download it and extract it to a location on your PC that best suits your needs. This extraction will generate the 'platform-tools' folder, a critical component in the process to root Mate 40 Pro. Step 2 : Enable USB Debugging and OEM Unlocking on Huawei Mate 40 Pro To initiate the process to root Mate 40 Pro, it's crucial to activate USB Debugging and OEM Unlocking. By enabling OEM Unlocking on your Mate 40 Pro, your device becomes identifiable by your PC in ADB mode. This significant step paves the way for you to boot your device into Fastboot Mode, a necessary stage when you aim to root Mate 40 Pro. Here's how you gonna do that. : Enable USB Debugging and OEM Unlocking Step 3 : Unlock Huawei Mate 40 Pro Bootloader

In the third step of the process to root Mate 40 pro, it's essential to unlock the phone's bootloader. Remember, unlocking will result in a complete wipe of all device data. Therefore, it's highly recommended to perform a comprehensive backup prior to this stage. Once you've secured your data, you can proceed by referring to our detailed guide on How to Unlock the Bootloader on your Mate 40 Pro. Unlock the Bootloader on Huawei Mate 40 Pro Step 4 : Extract Boot.img from Huawei Mate 40 Pro Firmware Then you have to download the firmware for your Huawei Mate 40 Pro. You have to download the same version that is currently installed on your device. After downloading, extract the file to a suitable location on your PC. Now go to the extracted Firmware folder and see whether you can see the boot.img file. Just transfer this file to your phone and follow me.

Still Can't find boot.img or Don't know how to find it? How to Extract Boot.img from Huawei Mate 40 Pro Step 5 : Patch Stock Boot.img via Magisk - Firstly install the Magisk app on your phone. Read More: Everything about Magisk - And confirm whether the boot.img has been transferred to the device. - Now tap on the Install button. (see below image) - In the Options menu, enable both the Preserve Force Encryption and Recovery Mode options. - Then tap Next. - You will be navigated to the Method selection screen. Now choose Select and Patch a file.
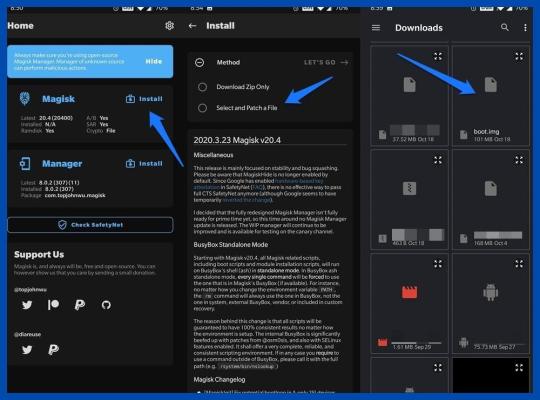
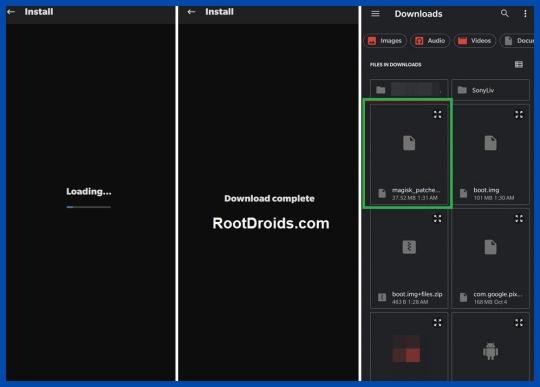
- As the next step, browse to the extracted boot.img file and select it. - Tap on the Let's Go button and Magisk will now load the boot.img file and start patching. - You will see a message saying Download Complete once the patching is done. - Then the patched boot image file will be saved as magisk_patched.img in Internal Storage > Downloads. - You can rename the file by deleting the random numbers at the end of the name. So the file will be named as magisk_patched.img. - Finally, transfer the file to the internal storage of your device for future use.
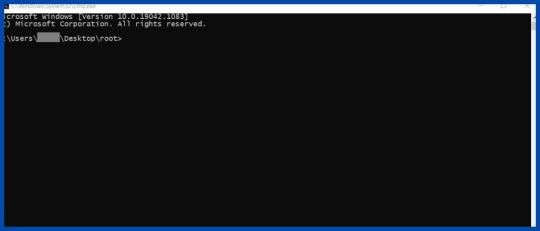
Step 6 : Boot to Fastboot Mode on Huawei Mate 40 Pro - Enable USB Debugging and connect your device to the PC using a USB cable. - Now go to the platform-tools folder, type CMD in the address bar and press Enter. or Search CMD and open it. after that, navigate to the platform-tools folder - That will launch the Command Prompt.
- Then type the following command in the CMD window to boot your device to Fast boot mode. adb reboot bootloader To verify the connection, type in the below command. You should get the device ID followed by the Fastboot keyword. if you get a reply from the command prompt, it means, the connection has been successfully established. fastboot devices Disable DM Verity: Only if you have a problem with performing step 7. Step 7 Flash Magisk Patched Boot.img and Root Mate 40 Pro - First transfer the magisk_patched.img file to the platform-tools folder. - Then type the following command in the CMD window to flash the Magisk Patched file. fastboot flash boot magisk_patched.img - Finally, enter the following command to reboot your device to the OEM. fastboot reboot Now, you have successfully rooted your device.
Conclusion
Rooting your Huawei Mate 40 Pro can significantly enhance your user experience, unlocking a plethora of features and customizations. This process, while technical, is made much simpler with the use of Magisk. Remember, while you root Mate 40 Pro, it's important to follow each step carefully to avoid any potential damage to your device. By rooting, you gain complete control over your device's system, giving you the freedom to customize and optimize your device to your liking. But always be cautious and informed about the risks involved. Happy rooting!
Frequently Asked Questions (FAQ)
Despite unrooting my mobile and using Magisk HIDE, apps still report my device as rooted. How can I fix this?

If your bootloader is unlocked, they will report your device as a rooted device. According to your description, Magisk Hide alone has failed to do the job. I suggest you try the "Repackage Magisk Manager" option in the Magisk Manager settings. It worked for me. I'm facing boot loop and app crashes after uninstalling Magisk via TWRP. How can I fix this? Q: I installed Magisk via TWRP(Temp version) and installed some modules. Thereafter, I decided to uninstall Magisk using the Magisk Manager APK. Then the phone rebooted and stuck into the phone logo with the red danger logo. I tried flashing Magisk again via Temp TWRP, but now a few apps keep crashing. I tried uninstalling and reinstalling them. But couldn't fix it. Can you help me? A: If your phone is stuck in the boot loop or apps still crashing, then you have to wipe the Dalvik cache again. If you still need to unroot for whatever reason you can try this: - Update Magisk first and then click uninstall from Magisk Manager. - manually flash uninstaller.zip from TWRP. - flash the uninstaller as a module as stated in this post. - Finally, if it's still no use, then you can factory reset the device to remove the root. What can I do if Magisk 16.3 keeps uninstalling itself?

Q: During the past 4 days I had to re-install Magisk 16.3 at least 4 times a day. Because it keeps uninstalling itself. I have previously experienced this issue with Magisk, but it has gotten worse instead of being solved. A: After uninstalling, you can try flashing the stock boot image from your ROM/firmware package/factory image. How can I resolve the MAGISK v16.0 installation failure message? Q: I tried to install MAGISK v16.O using MAGISK installer. But there is a message saying, Installation failed with (! Unable to repack boot image! Failed! ! Installation failed). What can I do to get rid of this? A: Just try uninstalling v15.3 first and then install v16.0 clean. What should I do if I encounter an error while installing Magisk using TWRP on my device? Q: I got this error when installing Magisk using TWRP. What am I supposed to do now? Updater process ended with ERROR:1 Error installing zip file '/sdcard/MagiskManager/Magisk-v13.3.zip' A: I advise you to use the magisk_uninstaller.zip first. From what I saw in your log, your boot. img is already patched by something else. Therefore, you need to install Magisk on your stock boot.img. What are the steps to resolve OTA Update failure after rooting with Magisk on a device? - To start you need to fully restore to stock and erase user data. (basically, the same as starting with a brand new phone). - Then, flash Magisk (I used the image provided on the thread about Magisk) fastboot flash boot magisk_patched.img. - Boot to Android. - Next, install magisk manager. - Verify root works. - Now, reboot to bootloader, flash default boot.img: fastboot flash boot boot.img. - Next, reboot to android. - Finally, apply OTA update. What can be done if MagiskHide or SafetyNet fails after an update? If MagiskHide or SafetyNet starts failing after an update to either Magisk, the app, or both you can fix it by toggling MagiskHide off and on (also see ”Test MagiskHide”). What can I do if Magisk isn't working as expected, such as not detecting the installation or experiencing loss of root? If you can boot up, but Magisk isn't working as expected (not detecting the Magisk installation, loss of root, etc), there are a few troubleshooting steps you can try. - First, Reboot. Sometimes this helps Magisk to mount everything as it should. - Try removing any installed modules. So that you can see if it's a faulty module causing issues. - If that seems to fix it, just install the modules one at a time to find which one causes issues. - If nothing else works, try starting from the very beginning with a new installation. - check here: "Asking for help/reporting bugs". What does the message "Invalid image: not signed" in the install log mean? In case you come across a notification in the install log stating "Invalid image: not signed" while attempting to root Mate 40 Pro, there's no need for an alarm. This simply implies that your boot image isn't signed, which is a typical occurrence in the process to root Mate 40 Pro. Rest assured, it's completely normal and not a cause for concern. What causes a "process error" when installing Magisk and how can it be fixed? A "process error" when installing Magisk is usually caused when the app doesn't have storage permission. So you can fix it by clearing app data. Why can't some users install or update the Magisk app or Magisk in the app v8+? When attempting to install/update either the app or Magisk in the Magisk app v8+, some users experience that nothing happens. Usually, this is caused by having a custom hosts file, or similar, that is blocking the CDN used by the Magisk app (JSDelivr). The solution is to whitelist that particular URL. Why can't I root my Huawei Mate 40 Pro with Magisk even after following the step-by-step guide provided on the website? If you are naive to rooting, you are at the right place. How about the people who are experienced in rooting? We are here to provide you with a root solution to every feature you were wishing for. Please go to the top of the website and try the step-by-step guide again. Read More: Everything Read the full article
0 notes
Text
Realme 5 RMX1911EX_11_C 53 Official Firmware Free By
If you have any questions about this newly-released flash tool or its usage or feel stuck anywhere while performing the instructions in this guide, then feel free to ask us. The Realme Flash Tool flashes firmware on phones over the Fastboot interface. For the same reason, it is necessary to have your phone’s bootloader unlocked. In this article, we will be sharing a very important guide which may…
View On WordPress
0 notes
Text
Have I had food yet? Nope.
But, more progress on the other front! Turned out the continuing issue was that the WebUSB bootloader unlock/install process was just not communicating with the phone properly.
So, I finally said "Fuck that noise! We're going manual."
Now I am taking another break while it finishes doing its flashing magic. And very much hoping that I didn't just brick the fucker.
But yeah, Totodile is on the job in there. And I really should eat something once I go back and check the results. 😮💨
Assuming it actually works, I am planning to leave well enough alone and not even fuck around with Magisk tonight. Probably going to leave the bootloader unlocked for the moment, though.
If it doesn't but will still let me at the bootloader, we may just fall back to stock Android for now.
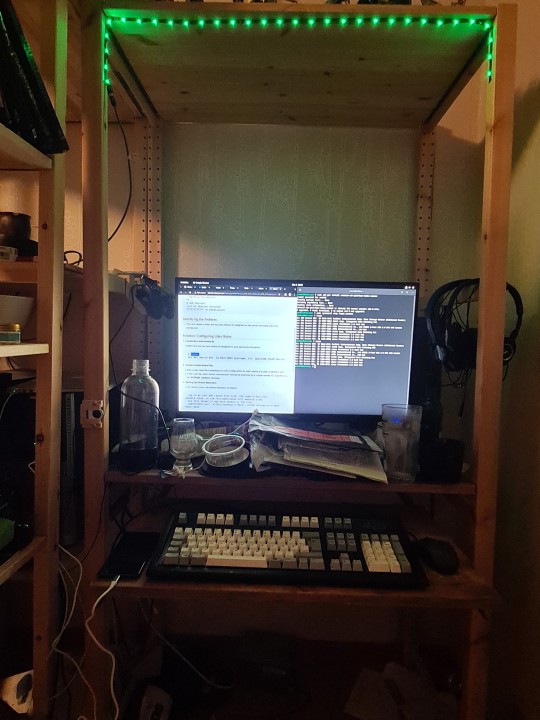
Only this time, WITH sudo access, and that LED strip thankfully left somewhat on. Because it's dark as hell back in his lair at night otherwise.
Back in business for Operation Graphene!
The green light is probably coincidental, but we have the green light! 😅 (That strip is actually multicolored programmable, running off a Raspberry Pi. And I am still not sure how to control it. Wanted more illumination last night.)
Good thing that I did ask to be added to the sudo group earlier. Because it looks like next up, we're doing this, which I almost forgot about until "Oops, I guess it doesn't know how to talk to the phone yet!":
Looking like a relatively quick and easy option.
Once again, I just want to unlock my bootloader. 🫤
At least this shit is relatively easy dealing with the Pixels. Which is one of the reasons I opted for one this time.
10 notes
·
View notes
Text
How to Unlock Bootloader on Xiaomi Device
How to Unlock Bootloader on Xiaomi Device
Xiaomi devices have great help in custom development, especially on XDA forums. users having Xiaomi smartphones running Android can test to root their device or try custom ROMS. It will just open a renewed world of customization to their phones. To do so users are firstly required to unlock the bootloader of their devices. Below is a step-by-step tutorial on how to unlock bootloader on Xiaomi…

View On WordPress
0 notes
Photo

How to Root Realme X50 Pro & Unlock Bootloader (Guide) #Guide #How-To #realme #RealmeX50Pro https://t.co/0NgBBrRXGj http://twitter.com/iandroideu1/status/1246905713357512705
How to Root Realme X50 Pro & Unlock Bootloader (Guide) #Guide #How-To #realme #RealmeX50Pro https://t.co/0NgBBrRXGj
— iAndroid.eu (@iandroideu1) April 5, 2020
0 notes
Text
How to Install and Configure Stump Root on Your LG smartphone

Stump Root is probably the most powerful and best tool for rooting LG smartphones with its powerful scanning engine. If you're an LG device user, you can utilize this software to gain superuser access to your smartphone. With this tool, you will get to perform almost anything including changing settings, installing custom apps and so much more. All of these activities will be done while your device remains secured and without any hassle. In order to get started, just download and install Stump Root onto your LG smartphone.
With the help of Stump Root, you will also be able to easily modify and customize your LG smartphone's features and functions. For instance, if you have a certain application which you need for certain functions, but it does not work on your LG device due to the LG device's inadequate memory capacity, all you need to do is install the Root Manager app. Once it is installed, you will easily be able to tweak the system and perform other necessary functions such as unlocking the bootload, disabling unwanted files, and so on.
There are a lot of people who are a little bit confused about the process of unlocking their android devices
This is understandable because there are a lot of tutorials and guides that are available online but oftentimes, they are either too complicated or too basic to be of much help. This article will briefly discuss how Stump Root works and how you can utilize it to effectively root your LG smartphone using the Stump Root PC Optimizer software.
First, let us look at how this specific program works. It uses a system file backup feature that enables it to backup the currently used user Interface partition. It also copies the settings of your phone including the junk and ignores lists. In order to complete the installation process, the software prompts you to backup the existing user software and then the system partitions as well. The Stump Root PC Optimizer also detects all necessary system files and detects the android 4.4 earlier.
Click here to download - Stump Root Last Update
Installing the Stump Root PC Optimizer on your LG Android smartphone will allow you to easily perform a variety of tasks such as changing the password, rebooting the phone, locking the screen, and so on. These are just among the many features that you can enjoy once you download and install this app. Apart from these, it also provides the facility to recover SMS and MMS messages that you have accidentally deleted. Apart from all these amazing features, another amazing function of Stump Root is that you will be able to completely customize your phone according to your needs. You can add a couple of add-on applications such as calculator and weather widgets which will provide you with a better browsing experience on your LG smartphone.
To download Stump Root
you need to connect your LG smartphone to a computer using a USB cable. Once connected, the Stump Root PC Optimizer program will prompt you to download its software. After downloading the software on your LG smartphone, it will begin to scan your device for any rooted directories or files. Once the software starts scanning your device, it will display a list of all the files found on your device including those directories that may be infected by various infections such as adware, spyware, and so forth.
Once the scan is complete, it will ask you to restart your device in order to clear all the errors. After restarting, it will automatically begin the rooting process. You need to allow the Stump Root PC Optimizer to run through a series of checks in order to successfully complete the installation process. It is important to note that the software will require you to allow it to run through "safe Mode". This is because if you do not do so, you may not be able to perform the tasks that it needs to do.
Conclusions
Finally, after the installation process, you will need to connect your smartphone again to the computer in order to view the Stump Root log on the system. From here, it will show you which files it has successfully scanned and which ones it failed to detect. Based on this log, it will then inform you which directories need to be modified. You will then be given the green light to either modify or remove the corrupted files from your smartphone. The Stump Root will effectively help you prevent data loss due to numerous reasons. You will also be provided with a very user-friendly system that will allow you to easily perform the necessary actions to keep your LG smartphone safe from data loss.
1 note
·
View note
Text
Download Facebook Password Sniper V1.2 For Android
Facebook password sniper 2014 v1.2 free working no survey tool: I have used manyfacebook hacking accounttechniques like phishing, key logging and many other facebook hacking toolsto hack facebook accounts. Alass! Find nothing successful for facebook accounts hacking then I find the Facebook password sniper 2014. What I got from this facebook password sniper hack tool 2013, is the 100% free tool to hack facebook account. Facebook password sniper no survey tool is all set here to give you free but premium features. Serato dj free download for android. Say yes! If anyone ask you to hack facebook account.
Download Facebook Password Sniper V1.2 For Android Download
Download Facebook Password Sniper V1.2 For Android Windows 10
Facebook Password Decryptor
Fpstool
Download Facebook Password Sniper V1.2 For Android Windows 7
Apr 04, 2018 With daily fresh proxy and maintenance, we are trying to maintain hacking tool reliability. Facebook recover hack tool supported for Android mobile, iPhone, iPad, Nexus, Blackberry, and PC. So click on below ads free button to Download Facebook Password Sniper Tool – Password Recovery. On the demand of our respected daily viewers. Facebook Password Sniper Free Download for Pc & Mac. Facebook Password Sniper is a hack tool which is launched on may 23. This tool is used to hack and recover facebook accounts. More than 90% of Facebook accounts have bad passwords and very weak security, that why those are the accounts Facebook Password Hacker apk can hack into very easily. There obviously are accounts that have very.
Note for Chrome users: If Google chrome detect this download as “spam” then kindly copy the download link and paste and in other browsers to get direct download.
Facebook password sniper 2014 v1.2:
Facebook has covered its all security loop hole recently. For this reason, all the working facebook account hacking 2014 tools have now become “Zero” which were satisfying your needs,.This facebook password sniper 2014 v1.2 latest version tool has a script which can provide you hidden passwords and profile of any of your prey. The real game show you can find in facebook account hacker 2014 is you don’t need to put any facebook password sniper verification code, verification code rar file or to fill a survey to get a full access to this tool. Just make a download of this tool install it enjoy it. Let show some aggressive attitude to those who are annoying for you. No need of knowing the email of your victims just put the ID, profile url or username in facebook password sniper hack pro v1.2 and get the blast.
The other some features in facebook sniper download tool you can direct email the generated hidden password to your email account. No need to show off your password sniper hack tool. You can also enjoy the verification code youtube videos. Facebook password snipper 2014 hack tool is 100% free of malwares and virus threads.
KingoRoot - The Best One Click Android Root Apk for Free. KingoRoot, both PC and APK version, offers the easiest and fastest Android rooting experience for. Root my phone free download.
Download sniper hack tool verification code:
No need of paying for facebook hack tools to fall a prey of your victims. Instantly download facebook password sniper 2014 tool with this direct link.
Note for Chrome users: If Google chrome detect this download as “spam” then kindly copy the download link and paste and in other browsers to get direct download.
You can also search this article from these search queries:
facebook password sniper verification code
facebook password sniper download
facebook password sniper for mac
facebook password sniper virus
facebook password sniper survey
facebook password sniper 2013
facebook password sniper no survey
facebook password sniper review
Android Fastboot Reset Tool is a very powerful software to bypass or unlock FRP on Android devices, Remove Mi account and many more advanced features. Have you forgotten your Android phone pattern? No problem. You can now reset it using Android Fastboot Reset Tool. Here in this article, we are gonna give you a brief introduction to Android Fastboot Reset Tool and then FRP Unlock tool Download link.
What is FRP in Android?
FRP stands for Factory Reset Protection. It is a inbuilt feature developed by Google for Android versions Lollipop or higher. You can check Which Android version you are using. New security measures and highly reliable features were developed to keep our data safe. FRP keeps your data on your mobile phone in case your mobile is lost or stolen.

You can prevent others from using your data if factory reset option being used without your permission. Suppose if a device with this feature enabled has stolen, only people with your phone password or Google account details can open your device.
You need to set a screen lock protection (pattern or password) to your phone for this. Here is how you can Set screen lock for Android device. Also you need to add your Google account to your phone.
What FRP Unlock Tool or Android Fastboot Reset Tool does?
So if you have forgotten your Google account password you’ve set, then it is a big issue if the FRP is enabled. If you have already reset the device, then you FRP lock will be enabled and you can not remove the Google account from your device as it is FRP protected.
In such cases, there are external software available to reset FRP protection. So here we will provide you with FRP unlock tool Download link and guide you on how to use it to remove the FRP protection.
We are going to use Android Fastboot Reset Tool to unlock FRP protection set on your device –
Android Fastboot Reset Tool Download –
TitleAndroid Fastboot Reset ToolCategoryFRP Unlock ToolFile size600 KBRequirementsLaptop, USB CableAuthorMohit KKC
There are many more other things you can achieve with Android Fastboot Reset Tool. Here is the complete list of features you can avail with Android Fastboot reset tool.
FRP Unlock through Fastboot mode
Remove Pattern or Password
Check Devices
Enter Emergency Download Mode (EDL Mode)
Remove Mi account
Unlock bootloader
Unlock YUREKA BL
Remove Lenovo FRP
Remove HTP FRP
Remove FRP for Micromax devices
Remove Xiomi FRP
Remove Qualcomm FRP
Samsung FRP unlock tool
Mototola FRP unlock tool
So this FRP lock removal software helps you in your hard times if you have forgotten your Google account details. Now let’s see how you can unlock FRP using Android Fastboot Reset Tool.
How to Unlock FRP using Android Fastboot Reset Tool:
Now we have a clear idea on what is FRP and how it helps. Let’s see how we can remove FRP lock using Android Fastboot Reset Tool.
Download Android Fastboot Reset Tool using above Download link. It will take few seconds to Download the zip file on to your laptop.
Open you Mobile phone and connect it to your laptop via USB cable.
Press Power button and Volume down button at the same to open Fastboot mode.
Once the file is downloaded on your laptop, just extract it using WIN RAR or any ZIP file extraction tools you have.
Open the extracted folder now. You will find Android Fastboot Reset Tool V1.2 file with exe extension. Just double click on the file to open it.
You will find bunch of options with numbers or alphabets. Now choose the number which is relevant to your phone brand. (Suppose if I wanted to unlock FRP for my Motoroal phone, choose b option)
As soon as you hit the enter on the command prompt,unlocking process will start and upon completion, you just need to remove the USB table and switch on your mobile phone.
Voila! You have FRP unlock tool download and bypass the FRP lock successfully. Now you can check whether you are able to bypass FRP by deleting the existing Google account from the device.
Download Facebook Password Sniper V1.2 For Android Download
How to Bypass or Unlock FRP protection manually?
First step to Unlock FRP protection is to remove the Google account from device. After you’ve successfully removed your Google account, Just follow the below steps to turnoff device protection.
Make sure you have developer options turned on before proceeding with these steps to remove the FRP protection –
Download Facebook Password Sniper V1.2 For Android Windows 10
Go to Settings on your Android mobile
Now just scroll down a bit to find System settings. Just tap on that option.
Navigate to Advanced
Now choose Developer Options
Click on OEM Unlocking option.
Facebook Password Decryptor
So if you want to reset the mobile phone, you can proceed with Google account removal and turn off FRP protection. Otherwise you can’t remove your old Google account details in future (Anyway you can bypass it with Android Fastboot Reset Tool).
Fpstool
Disclaimer: This guide is only for educational purposes. We are not responsible for any damage to your device. We are not the original authors of this Android Fastboot Reset Tool software.
Download Facebook Password Sniper V1.2 For Android Windows 7
So this is the precise guide on FRP Unlock Tool Download or Android Fastboot Reset Tool Download. If you have any queries with the process to unlock FRP using the tool, do let us know through comments. We will be glad to help you. Cheers!
1 note
·
View note
Link
Do you want to unlock Huawei bootloader? There are lots of ways through which you can unlock the Huawei bootloader. Which includes the official as well as unofficial methods.
Below we mention the exact ways to unlock the Huawei bootloader. But now official Huawei not provide the unlocking codes. You have to buy or join some of the relevant forms to get the unlocking codes.
1 note
·
View note
Text
How to Unlock Bootloader on Nubia Devices
How to Unlock Bootloader on Nubia Devices
In this complete tutorial, we can show you the steps related to ‘How to unlock the bootloader on Nubia devices’. The devices from this Chinese OEM contained a broad discipline, starting from its budget-friendly Z and N series and going all the path up to flagship levels with its Red Magic lineups. In this concern, the 6th version in its Red Magic series has boasted some amazing specs. And, its…

View On WordPress
0 notes
Photo

How To Root Redmi Note 9 Pro and Unlock Bootloader (Guide) #Guide #How-To #RedmiNote9Pro #Root https://t.co/N2kFOGdmj7 http://twitter.com/iandroideu1/status/1241198123617153024
How To Root Redmi Note 9 Pro and Unlock Bootloader (Guide) #Guide #How-To #RedmiNote9Pro #Root https://t.co/N2kFOGdmj7
— iAndroid.eu (@iandroideu1) March 21, 2020
0 notes
Text
OnePlus Devices
All through every single year, OnePlus pioneers top our summary of the best telephones for setting up. Why? Generally considering the way that setting up doesn't void your assurance, and OnePlus puts forth a unique attempt to make the whole strategy as straightforward as could be normal the situation being what it is.

In the event that you're new to setting up, it might show up more trouble than it's worth — yet luckily, your OnePlus 6 likely the most clear Root OnePlus Devices. To smooth out things essentially further, I've spread out the entire methodology in plain English underneath, and we have guides that truly explain a segment of the more befuddled core interests. Root OnePlus Devices
This particular methodology uses Magisk, which is a systemless root utility. The upside of Magisk over choices like Chainfire's SuperSU is that you can value the benefits of root without staggering Google's new SafetyNet system and losing access to applications like Android Pay or Netflix, so there's nothing being referred to here. To begin with, you'll need to open your telephone's bootloader, which will allow you to streak custom firmware records on the device.
In the event that you're familiar with this technique, here's the feigns notes variation: Back up critical data (opening bootloader will wipe your device). Engage Developer Options by tapping "Production Number" on numerous occasions. Enable "OEM Unlocking" in Developer Options. Engage "Advanced Reboot" in Developer Options. Raise power menu, tap "Reboot," by then "Bootloader."
Associate with your PC, present ADB and Fastboot. Open a request window; change lists to the stage instruments coordinator. Send "fastboot contraptions" request to check affiliation. Send "fastboot oem open" request to begin bootloader open. Check bootloader open on your telephone with volume and power gets.
Complete starting Android course of action process again. If bootloader opening is another plan to you, we have a full instructional exercise focused on opening the bootloader on your precise model of telephone. To get away, head to the going with helper, which should take 20–30 minutes for a beginner. By and by that your bootloader's opened, you'll have the choice to present TWRP. This is a custom recovery that replaces the stock recovery interface on your telephone and allows you to streak custom ZIPs and firmware archives.
One of the ZIPs you can streak with TWRP is Magisk, which is the mod that will truly root your telephone. Next, you'll need to present the Magisk Manager application on your telephone. This application won't simply fill in as your root the board application to permit or deny superuser advantages to various applications, yet it will moreover give an interface to presenting Magisk modules
and help you with hiding your root status from Google's SafetyNet. To present Magisk Manager, tap the association underneath from your OnePlus 6. You may need to long-press the association and pick "Download Link," dependent upon your program. At the point when the report has been downloaded, open it from your notice plate (basically tap the Download complete notification), by then press "Present" when affected.
1 note
·
View note
Text
Baidu Root - How to root android in 1 minute.
This is a complete guide on rooting android devices with Baidu Root, One of the most widely used standalone rooting third-party applications in the world currently. Baidu Root is a powerful world renowned rooting tool that can help you to get root access for any Android device. Say bye-bye to your android rooting dilemmas. This baby will do the hard work for you.

Baidu Root discovered - How to root android
This is the best tool for rooting your android device on the web today. The latest version 2.8.6 is capable of supporting almost more than 10,000 android devices currently which is an amazing feat. What's better about this app is that it does not require you the integration to a computer for the root process. Isn't that convenient? Simple and fast! But do note that the freshest version of the app is only still available in Chinese, therefore, you must pay extra attention to the installation steps and prerequisite steps before starting any process.
Specifications of the app
One-Click Rooting.
Available in English.
No need for PC integration.
Android KitKat and later supported and compatible with Android Gingerbread, Honeycomb, Ice Cream Sandwich, Jelly Bean, KitKat, Lollipop.
Capable of rooting many device brand models.
App size 10.68 MB
Last update date is August 19th 2018
Rooting Prerequisites
Make sure to keep a back up of all device data before starting any process related to rooting.
Unlock device Bootloader and OEM Unlocking.
The battery level of device at least 70%.
A fully reset device after keeping a back up.
Features of the App
Able to root many Android devices at once.
Can erase pre-installed applications.
Free to use and certified safety for general usage.
Boost device overall speed.
Final Steps.
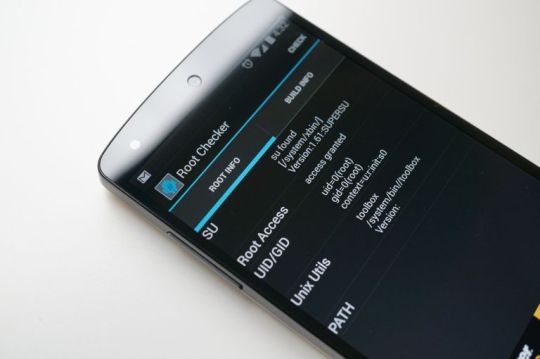
Make sure to back up your device data as system changes could damage or erase the existing data in certain circumstances.
Go on to > Developer Options and toggle on > USB Debugging
(Connect the device to your PC via USB cable)
Baidu Root will detect your device automatically and accept the user agreement > Root.
Your device will now be rooted within a minute and it will reboot. Now you have a successfully rooted device.
A word of advice for the amateurs: do not attempt root features meant for advanced users unless you want to brick your device "accidentally" during the rooting process. Therefore, make sure to do initial research on at least the XDA developers forum as it has everything you need to know about Android rooting as it is a tightly run ship by a closely-knit Android developer community.
1 note
·
View note
